I wanted to created a scene using the techniques of extruding, lofting, revolving and planing, so I looked up a fairly simple building sketch online to sort of follow.
Here is the original sketch.
I chose it because the isometric view of the building could help me get a grasp of what its different sides looked like.
Here is the recreation I made in Maya.
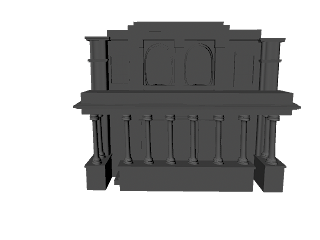 |
Front View
|
 |
Side View
|
There are obviously some differences between the two but I wanted to focus on building the shapes and getting the feel right as opposed to exactly capturing the sketch. In a future endeavor I will more closely follow the original sketch.
The columns are a curve that was rotated around the y-axis. The window panes are NURBS squares that were laid within one another and then the whole thing was planed in order to leave the panes empty and create a frame around them. A further framed it with cubes to fit just to make the windows stand out more. The curved windows in the upper center portion of the facade were created by extruding a tube out from a circle that I altered to fit the design I wanted.
I have to admit that I could not find a reasonable use of a loft on such a square building like this so I made a flower to put out in front of the building.
 |
So Pretty
|
 |
| The Flower From Behind |
The flower was created by lofting several wavy curves and then flipping it so that the bottom was visible. This is the underside. I did some further adjustments in order to give the petals some depth. The stem from the flower is a circle that has been extruded back on a funky curve. The design of the line that it was extruded from was further altered to work with the stem look.
I hope to in the future add some texture and color to my building and build a scene around it.


Cool. Working from pictures of an Austin building would also be interesting.
ReplyDelete